Battlefield Driving Tour
Ten stops across the ground where the Battle of Richmond was fought on August 29 and 30, 1862.
Download the printable tour (PDF)Before you set out
The tour starts at the Battle of Richmond Visitors Center and covers both Union and Confederate points of interest, with some backtracking. Stops run in roughly the order the battle took place; we recommend driving them from stop 1 to stop 10. Most stops have interpretive signs that highlight the action there. If a sign is missing, please let the Richmond Tourism and Main Street Department know.
Optional stops A through H aren’t part of the main route, but they’re worth a visit if you’re nearby.
As you go, remember that in 1862 this region was in a terrible drought, with daytime temperatures around 98 degrees.
Drive with care
- Most stops are on private property, and visitors are there with permission. Please treat these places accordingly.
- Some roads are narrow and heavily traveled, and parking at some stops is very limited. Park safely off the roadway.
- Off-road stops can have natural hazards such as wildlife and undeveloped paths.
Guided tours are available.
The tour stops

Stop 1: Battle of Richmond Visitors Center
Begin your tour at the Battle of Richmond Visitors Center, 101 Battlefield Memorial Highway, just south of Richmond. Housed in the ca. 1811 Rogers House, the center gives visitors a great overview of the battlefield and the many personalities associated with the battle. To check current hours, call 859-624-0013.
Stop 2: Bobtown
3.6 miles from stop 1
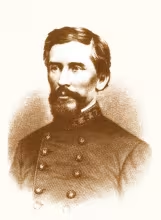
Confederate Brig. Gen. Patrick Cleburne’s division arrived near Bobtown late on August 29, 1862. Confederate cavalry led Union cavalry into a snare here. After a brief skirmish the Union cavalry retreated. The Confederates rested in this area, then marched to Kingston early the next day. The sign is at stop 1.
Stop 3: Battle of Richmond Phase I: the battle for Mt. Zion Church
2.9 miles from stop 2
You are near the first Confederate artillery position. The initial Federal line is three-quarters of a mile north, mainly on what is now Army Depot property. Confederate artillery was to your right, with infantry immediately behind it. From 7 until 9 a.m. on August 30, this was not a good place to be.
Stop 4: Blue Grass Army Depot
1.7 miles from stop 3
This stop is currently unavailable. It sits right behind the initial Federal line: three Union regiments were in front of this position and one was off to the right across the main road. Fighting lasted here from 9:30 until a little after 11 a.m., when the Union line collapsed, its ends folding in on the middle. Ask at the Visitors Center how to access the Army Depot.
Stop 5: Battle of Richmond Park
1.2 miles from stop 4
You are now behind the Confederate line. Most of the fighting happened on the Army property to your front and right, but the Confederates used a hidden ravine to your left, Churchill’s Draw, to outflank the Federals.
The ca. 1824 brick home, Pleasant View, was home to the Kavanaugh Armstrong family and served mainly as a Confederate hospital. The smaller building in front of the main house is a surviving slave cabin. Restrooms are available here. The nearly two-mile walking trail is lined with interpretive signs, and the Texas monument stands at the end of the western trail overlooking Churchill’s Draw. Pleasant View and the Battle of Richmond Association’s book and gift shop keep limited hours.
Stop 6: Mt. Zion Church
0.9 miles from stop 5
The Federal line ran just south of the church, mostly to the east. Built around 1850, the church served as a Federal hospital during and after the battle and took artillery damage in the fight. The building has changed little since. Tours are by advance appointment only; ask at the Visitors Center.
Stop 7: Battle of Richmond Phase II: the battle of White’s Farm
2.1 miles from stop 6
After a disorganized retreat from their first position, Federal forces regrouped at the Rogers House and moved north to this area, with Manson’s division to the east of the intersection and Cruft’s to the west. Federal soldiers advanced into the approaching Confederates west of the intersection and were driven back with heavy losses. Four interpretive signs just off Duncannon Road explain the action.
Do not try to enter the Army Depot at this gate. It is a heavily restricted area, and photos are not allowed.
Stop 8: The race to Richmond
0.7 miles from stop 7
After a 45-minute fight that ended around 1:30 p.m. near US 25 and Duncannon Lane, the Federals made an even more disorganized retreat toward Richmond, with the Confederates in light pursuit. Earlier in the day, Confederate cavalry under orders to cut off any Union retreat had swung wide to the west on roads and farm lanes. This stop shows the rolling terrain the Confederates used to their advantage throughout the battle.
Stop 9A and 9B: Battle of Richmond Phase III: the battle for the Richmond Cemetery
4.9 miles from stop 8
Overall Federal commander Maj. Gen. William “Bull” Nelson arrived from Lancaster to find his army shrunken and demoralized. He formed a third line in the Richmond Cemetery (stop 9B) while the Confederates lined up along the Old State Road, now Big Hill Avenue (stop 9A). Nelson’s men stood their ground but could not hold. The Union line collapsed from right to left, Nelson was wounded, and the panicked Federals streamed through the streets of Richmond. This phase lasted an hour, from 4 to 5 p.m.
Stop 9A is in the Madison Kindergarten Academy parking lot. Stop 9B is an active cemetery; please show proper respect.
Stop 10: Mass capture and the Madison County Courthouse
0.4 miles from stop 9
Confederate cavalry finished its ride west and north of Richmond and, around dusk on August 30, captured more than four thousand Federal soldiers just north of town. Nelson and Cruft escaped, but Manson and his staff were captured on the Lexington Road just north of present-day I-75 (the exact spot is unknown). Most of the prisoners were marched back to Richmond and held around the Madison County Courthouse until their release.
Who fought here
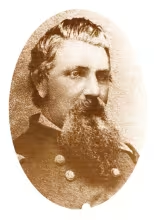
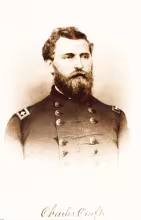
Union

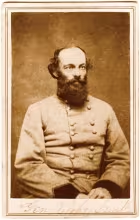
Confederate
Optional stops
A. Cox-Simpson House
This ca. 1839 home served as a hospital during both the Battle of Richmond and the Battle of Big Hill (August 23, 1862). It is now the Jackson County Visitors Center. Hours are limited; call ahead at 606-965-2485.
B. Confederate cemetery and ruins of Merrick Jones Tavern
The tavern served as a Confederate hospital, and several Confederate soldiers are buried here. Traffic here is very dangerous, and in warm months the area has many snakes, some poisonous. Visit at your own risk.
C. Thomas Palmer House
This small home in Battlefield Estates served as a hospital. Prominent Richmond resident John Miller died here after being mortally wounded while serving as a civilian aide to Gen. Cruft. It is now the Battlefield Golf Course pro shop.
D. White Hall State Historic Site
Home of the Kentucky abolitionist Cassius M. Clay, at 500 White Hall Shrine Road just off I-75 exit 95. For hours, call 859-623-9178.
E. Mt. Pleasant
Nearly all the captured Union soldiers received their paroles inside this ca. 1835–40 home overlooking Richmond. It has been restored and is privately owned; ask at the Visitors Center about arranging a tour.
F. Madison Female Institute (Madison Middle School)
Opened in 1858, the Institute was taken over by Union medical authorities and used as a hospital for wounded men of both sides for ten months after the battle. The original building was razed; Madison Middle School stands on the site.
G. Retreat from Richmond (Madison County Library)
This interpretive marker details the Federal retreat from Richmond after the third phase of the battle in the Richmond Cemetery.
H. Sisters of Charity (St. Mark’s Catholic Church)
In the weeks after the battle, six Catholic nuns from Cincinnati who had trained as nurses came to Richmond to care for the wounded of both sides. This marker tells their story.
Summary of the Battle of Richmond
By Dean Warren Lambert. © 1992 Dean Warren Lambert and Robert C. Moody; re-edited 2007 by the Richmond Tourism and Main Street Department.
In mid-summer of 1862, the Confederates developed a brilliant though rather loosely coordinated plan for a two-pronged advance into Kentucky. In the last half of August, Gen. E. Kirby Smith with 19,000 men advanced from Knoxville toward Cumberland Gap; at the end of the month, Gen. Braxton Bragg with about 30,000 men started from Chattanooga, maneuvering toward Nashville.
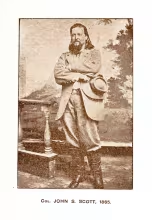
Bypassing a Federal garrison at the Gap, Kirby Smith left 9,000 of his men there and quickly marched north from Barbourville toward the Blue Grass. His cavalry under Col. John S. Scott routed a small Federal force at Big Hill on August 23. Smith’s lead division, Gen. Patrick Cleburne’s, reached Big Hill on August 29 and immediately advanced northward.
At Richmond, two untrained Federal brigades totaling about 6,500 men under Gens. Mahlon D. Manson and Charles Cruft were ordered by Gen. William Nelson to move west toward Lancaster, but the message was delayed and Manson pushed his brigade forward south from Richmond toward Rogersville. On the afternoon of the 29th he drove back Scott’s cavalry and went into camp near Rogersville; Cleburne’s division bivouacked at or near Bobtown, south of Kingston. At dawn on August 30, Cleburne, advancing up the Old State Road, came under fire from Manson’s artillery. Cleburne deployed his infantry along the Irvine-Lancaster Pike (now the Crooksville Road), just east of where it crossed the Old State Road north of Kingston, with Col. Preston Smith’s brigade in support behind Col. Benjamin J. Hill’s. Gen. James Churchill’s Confederate division soon came up from Big Hill. Confederate artillery was deployed on high ground above Hayes Fork Creek along the crossroads.
Kirby Smith ordered Cleburne to wait while Churchill advanced Col. H. T. McCray’s brigade up a country road west of the battlefield toward the Federal right at Mt. Zion Church. Cleburne’s veterans repulsed a determined flanking movement, which began to fall back just as McCray was getting into position, and Cruft, acting without orders, marched toward the sound of the guns and arrived on the field from Richmond. About this time Cleburne was wounded and Preston Smith took over as divisional commander. An attack on Churchill’s artillery west of the road failed. Manson’s brigade was outflanked on the east, and the whole Confederate line moved forward, with Scott’s cavalry on the flanks. The Federals were driven back in considerable confusion as far as White’s Farm at Rogersville, where they attempted another defense and were routed again. Kirby Smith, sensing victory, detached Scott’s cavalry to cut off the Union retreat on the other side of Richmond.
Nelson arrived on the field about 2:00 p.m., as the broken Union formations fell back to the edge of the town. Here Kirby Smith ordered a last general advance, three of his brigades in a single long line more than half a mile wide, against 2,200 men Nelson had whipped into a line from the Lancaster Pike to the Old State Road at Richmond Cemetery. Three volleys broke the line, and Scott’s cavalry captured virtually all of Nelson’s fleeing army. The most reliable casualty figures from the Official Records show that Nelson lost 206 killed, 844 wounded and 4,303 missing (most of them prisoners), for an aggregate of 5,353; the Confederates had 98 killed, 492 wounded and 10 missing, for a total of 600.
Manson can hardly be faulted for not receiving Nelson’s delayed order, nor for his initial advance, which secured dominant terrain in front of him, but rather for his advance with the green troops at his disposal. If he intended it as a flanking action against a veteran division, it was foolhardy. Cruft appears to have been a sensible, solid officer overwhelmed by events beyond his control. Nelson simply arrived on the field too late; Napoleon could hardly have reversed such a disaster under these circumstances. Kirby Smith, Cleburne until he was wounded, and Churchill handled their better-trained units with calm skill. The inexperienced Union infantry fought with courage and determination against veteran Confederate foot soldiers commanded with fine order and discipline. Scott’s cavalry was dominant during almost all of the action; half the Federal horses never reached the battle at all. One of the two Federal cavalry regiments on the field, Metcalfe’s 7th Kentucky, behaved disgracefully from the first skirmish at Big Hill to the retreat from Rogersville. The artillery on both sides was well served, with Capt. James P. Douglas of the 1st Texas particularly distinguished while temporarily commanding all three of Kirby Smith’s batteries.
Tactically, the Confederate victory was one of the most complete of the entire war, but it was negated by the failure of Bragg and Smith to develop a single coherent strategic plan for exploiting the advantage they had won, or to coordinate their forces effectively in the campaign that ended with their retreat from Perryville.
The local effects of the battle were several. Madison County was bitterly divided in its loyalties, and the outcome of the fighting brought a temporary ascendancy of the Southern sympathizers, who promptly raised a regiment of Confederate cavalry, Col. David W. Chenault’s 11th Kentucky. Various buildings in the county were damaged during the battle or later when used as hospitals: the Court House, Mt. Zion Church, the Madison Female Institute, and other places. A number of civilians watched the fighting, some blundering into the way of the troops. Several prominent citizens served as military aides, largely on the Union side; one, John Miller, was fatally wounded while serving on Cruft’s staff.
For more on the battle, read Madison County: 200 Years in Retrospect by William Ellis, H. E. Everman and Richard Sears; When the Ripe Pears Fell: The Battle of Richmond, Kentucky by Dean Warren Lambert; or Battle of Richmond, Kentucky by Kenneth A. Hafendorfer.


The original tour brochure was financed in part by a grant from the National Park Service, U.S. Department of the Interior, administered by the Kentucky Heritage Council. The use of federal funds does not imply endorsement of the content by the National Park Service or the Kentucky Heritage Council.